
(Note: This continues from Smart Contract Programming 1.)
🎯 Practice 2: Minting an NFT
1. What is IPFS?
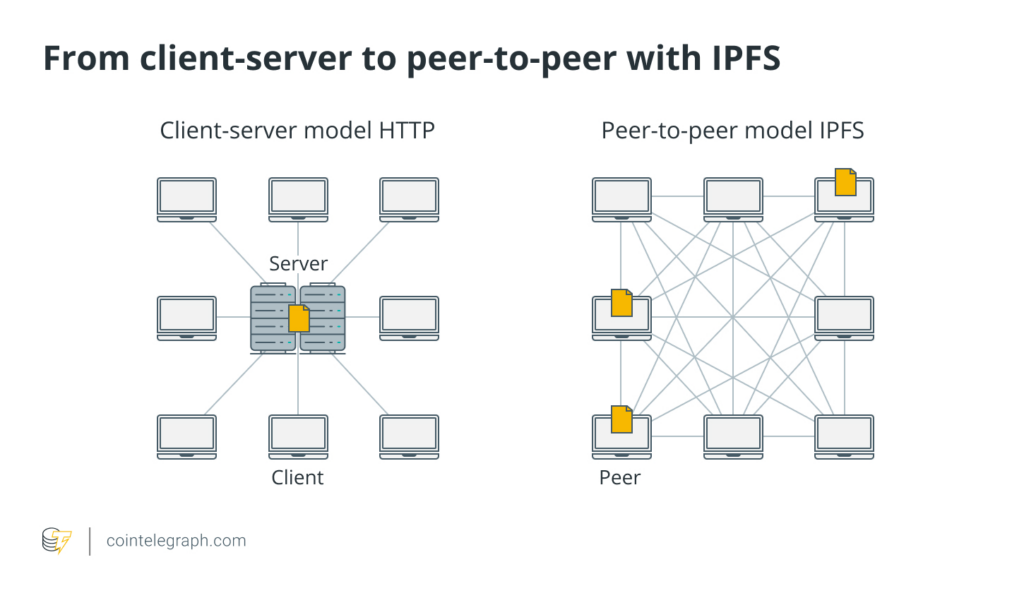
IPFS (InterPlanetary File System) is a decentralized network for distributing and storing files across nodes worldwide, without relying on a centralized server.
Unlike traditional server-based systems where the “location” defines a file’s address, IPFS generates a unique Content Identifier (CID) based on the content of the file itself.
If the file is altered in any way, a completely different CID is generated, naturally ensuring data integrity and permanence.
IPFS is widely used for storing NFT metadata, sharing digital artwork, and hosting decentralized websites.
2. How IPFS Works
When you upload a file to IPFS, a CID (Content Identifier) is generated based on the file’s content.
This CID acts as the file’s address, allowing anyone to access it.
If the file content changes even slightly, a new CID will be created.
Key point: CID is a “content-based address” that guarantees immutability and integrity of the file.
3. Relationship Between IPFS and NFTs
NFTs store only the “Token ID” on the blockchain.
Actual content (such as metadata and images) is stored externally.
The metadata (in JSON format) typically contains:
name (Name of the NFT)
description (Description of the NFT)
image (Link to the image stored on IPFS)
To securely and permanently store your NFT:
Both the image file and the metadata file must be uploaded to IPFS.
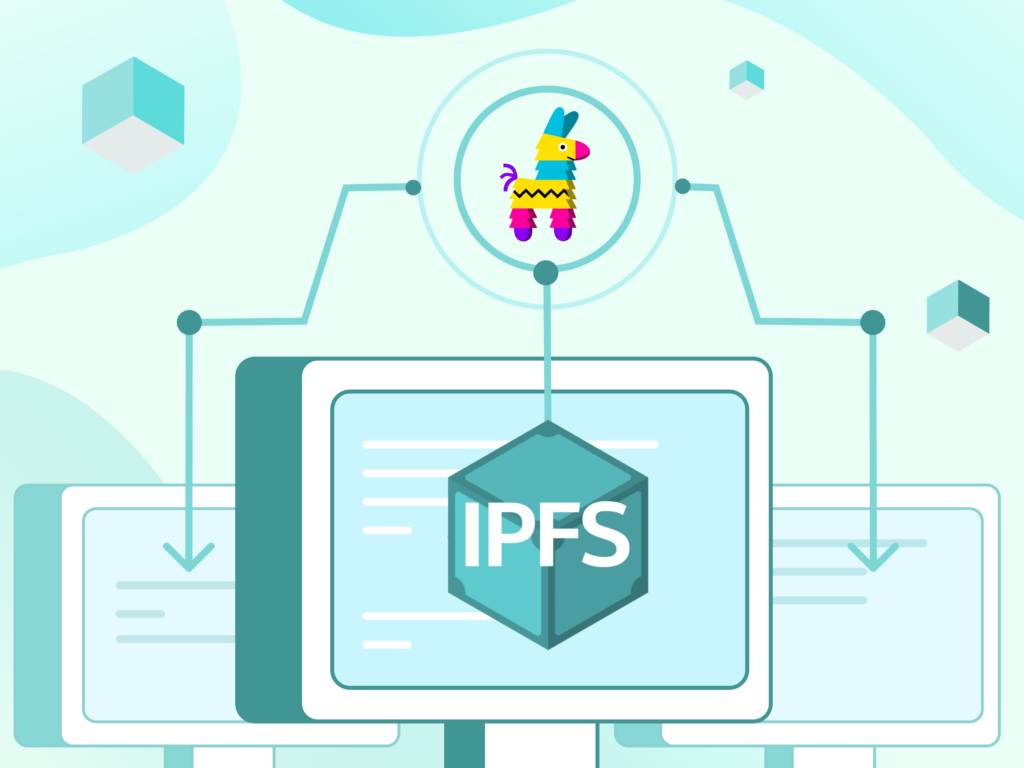
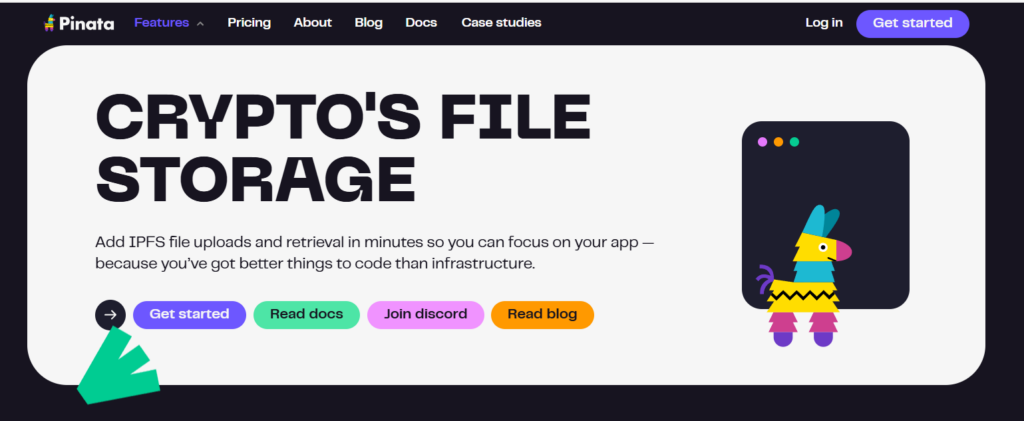
4. What is Pinata?
Pinata is a cloud service that simplifies uploading and managing files on IPFS.
It allows you to upload and manage files easily through a web interface without needing to run your own IPFS node.
Pinata is especially useful for uploading and managing images and metadata during NFT creation.
5. Practice: Uploading Image and Metadata Using Pinata
(1) Upload the Image File
Log in to Pinata.
Click Upload → File.
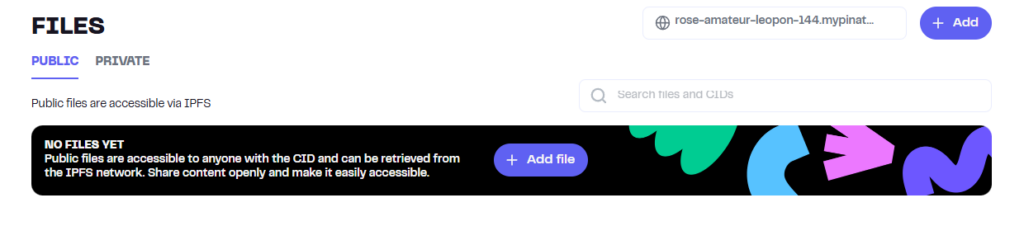
Select and upload an image (e.g., sunset_art.png).
After upload, a CID is generated.
Example image URL:https://gateway.pinata.cloud/ipfs/[CID]
Save this CID for later use.
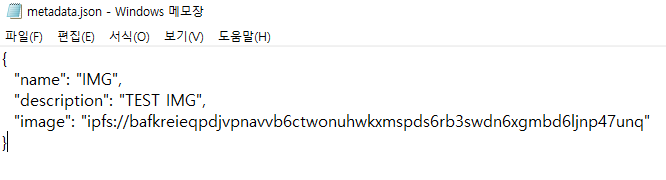
(2) Create the Metadata (JSON) File
Prepare the following content:
Copied!{ "name": "Sunset Overdrive", "description": "A beautiful sunset captured in digital art.", "image": "ipfs://[Image CID]" }
Replace [Image CID] with the CID of the uploaded image.
Save this file as metadata.json.
✅ Tip: How to create it using Notepad (Windows)
- Open Notepad (or any basic text editor).
2. Copy and paste the JSON content shown above.
3. Click File → Save As.
4. In the Save As window:
Change “Save as type” to “All Files”.
Enter the filename as metadata.json (make sure it’s not metadata.json.txt).
Select UTF-8 as the encoding if available.
5. Save the file to your desired location.
✅ Important:
Make sure the file extension is exactly .json, not .txt.
Otherwise, uploading to Pinata might fail or the NFT metadata might not be recognized properly later.
(3) Upload the Metadata File
Click Upload → File again.
Upload the metadata.json file.
A new CID will be generated — this will serve as the tokenURI for your NFT.
✅ Important:
NFT → Metadata (JSON) → Image (IPFS)
This is how the NFT links are structured.
6. Why Upload Both the Image and Metadata to IPFS?
The blockchain itself does not store large files like images due to size limitations.
Instead, NFTs reference external metadata via the tokenURI,
and the metadata file contains the link to the actual image on IPFS.
✅ In summary:
Both the image and the metadata must be uploaded to IPFS for the NFT to function properly.
7. Writing and Deploying the Smart Contract Using Remix IDE
(1) What is ERC721?
ERC721 defines the standard for Non-Fungible Tokens (NFTs) on the Ethereum blockchain.
Each token is unique and non-interchangeable.
OpenZeppelin provides a secure and extensible implementation of the ERC721 standard.
You can view the original source code here:
👉 OpenZeppelin ERC721.sol
(Note: OpenZeppelin is the most widely used library for smart contract development.)
(2) Core Structure of the Smart Contract
_name, _symbol: Stores the name and symbol of the token collection.
_owners: Records the owner address for each token ID.
_balances: Tracks the number of tokens owned by each address.
_tokenApprovals: Manages approvals for individual tokens to be transferred by another address.
_operatorApprovals: Manages operator approvals to allow another address to manage all tokens owned by an address.
These structures enable efficient ownership tracking, transferring, and approval management for NFTs.
(3) Key Function Summary
balanceOf(address owner): Retrieves the number of NFTs owned by a specific address.
ownerOf(uint256 tokenId): Retrieves the owner address of a specific token ID.
mint(address to, uint256 tokenId): Mints a new NFT and assigns ownership to the specified address.
burn(uint256 tokenId): Burns (deletes) an existing NFT.
transferFrom(address from, address to, uint256 tokenId): Transfers an NFT directly from one address to another.
approve(address to, uint256 tokenId): Approves another address to transfer a specific NFT.
setApprovalForAll(address operator, bool approved): Approves or revokes permission for an operator to manage all of an owner’s NFTs.
tokenURI(uint256 tokenId): Retrieves the metadata URI associated with a given NFT.
8. Practice: Creating Your Own NFT (MyNFT.sol)
(1) Writing the Smart Contract Code
Copied!// SPDX-License-Identifier: MIT pragma solidity ^0.8.0; import "@openzeppelin/contracts/token/ERC721/extensions/ERC721URIStorage.sol"; import "@openzeppelin/contracts/utils/Counters.sol"; contract MyNFT is ERC721URIStorage { using Counters for Counters.Counter; Counters.Counter private _tokenIds; constructor(string memory name_, string memory symbol_) ERC721(name_, symbol_) Array function mintArtwork(address recipient, string memory tokenURI) public returns (uint256) { uint256 newItemId = _tokenIds.current(); _mint(recipient, newItemId); _setTokenURI(newItemId, tokenURI); _tokenIds.increment(); return newItemId; } }
✅ Explanation:
The mintArtwork(recipient, tokenURI) function mints a new NFT and links it to a specified metadata URI.
Since we are using imports like:
Copied!import "@openzeppelin/contracts/token/ERC721/extensions/ERC721URIStorage.sol"; import "@openzeppelin/contracts/utils/Counters.sol";
you do not need to manually upload all OpenZeppelin contract files into Remix.
Remix IDE will automatically fetch these dependencies from GitHub or a recognized package repository (via the “@openzeppelin” namespace).
Just make sure your Remix settings allow automatic import resolution (which is enabled by default).
Thus, you can simply write the import lines — no need to copy-paste the entire OpenZeppelin code manually.
(2) Deployment Steps Using Remix IDE
Create a new file: MyNFT.sol.
Go to the Solidity Compiler tab and select version 0.8.x → Compile.
Open the Deploy & Run Transactions tab:
Environment: Select Injected Provider - MetaMask.
Contract: Choose MyNFT → Click Deploy.
Approve the transaction through MetaMask → Deployment complete.
(3) Minting the NFT
Call the mintArtwork function.
Provide the following inputs:
recipient: Your own wallet address.
tokenURI: The IPFS link to your metadata (e.g., ipfs://QmAbc456...).
Sign the transaction → NFT successfully minted.
🎯 Practice 3: Rock-Paper-Scissors Smart Contract Practice (WorldLand Version)
1. What is the Rock-Paper-Scissors Smart Contract?

This project implements the Rock-Paper-Scissors game in a blockchain environment using WLC (WorldLand Coin).
Since blockchain processes transactions sequentially,
the first player could potentially see and react to the second player’s move.
➡️ To prevent this, we use a hash commitment scheme.
✅ Full Process Overview:
-
Register (Registration)
➔ Players must first register by sending a deposit of 5 WLC. -
Lock (Commitment)
➔ Players submit a hash of their selected move (Rock, Paper, Scissors) combined with a random password string.
➔ Actual moves are kept hidden at this stage. -
Reveal (Opening)
➔ After both players have locked, they reveal their original move and password. -
Judge (Verification and Reward)
➔ The smart contract verifies the revealed data and determines the winner according to game rules.
➔ Rewards are automatically distributed in WLC.
✅ Why use this method?
- Binding: Players cannot change their move after submitting the hash.
- Hiding: Moves are concealed until both players reveal.
- ➔ Ensures complete fairness even in sequential blockchain systems.
✅ Smart Contract Source Code
Because the smart contract is relatively large,
please view the full source code directly on GitHub:
✅ How to Use the Contract
- Copy the entire code from the GitHub link above.
- Paste it into the Remix IDE.
- Compile with Solidity version 0.8.x (London compatible).
- Deploy the contract to the WorldLand blockchain using your own wallet.
2. Key Features
✅ Smart Contract Functions
| Function | Description |
|---|---|
registerPlayer(playerNumber) |
Player deposits 5 WLC to register |
lockShape(playerNumber, shape, randomString) |
Submit hash of move + random string |
revealShape(playerNumber, shape, randomString) |
Reveal original move and verify |
distributeRewards() |
Determine the winner and distribute rewards |
timeoutReset() |
Reset the game after 600 seconds of inactivity |
3. Timeout Reset Function
If players stop playing mid-game, the contract allows a timeout reset after 600 seconds (10 minutes).
✅ Timeout Handling Rules:
| Situation | Action |
|---|---|
| Both players at same stage | Refund WLC equally |
| One player proceeded alone | Award full WLC to that player |
➔ This protects the game from players intentionally stalling the match.
4. Difference from Traditional Web Services
✅ Comparison Table
| Item | Traditional Web Service | Rock-Paper-Scissors Project (WLC) |
|---|---|---|
| Backend Server | Required (e.g., Node.js, APIs) | Not needed (Blockchain is backend) |
| Data Storage | Centralized database | Smart Contract (decentralized) |
| Failure Point | Server crash affects service | Blockchain maintains availability |
✅ Why is this possible?
- Blockchain (WorldLand) manages:
- Player registration
- Locking and revealing moves
- Winner determination
- Reward distribution
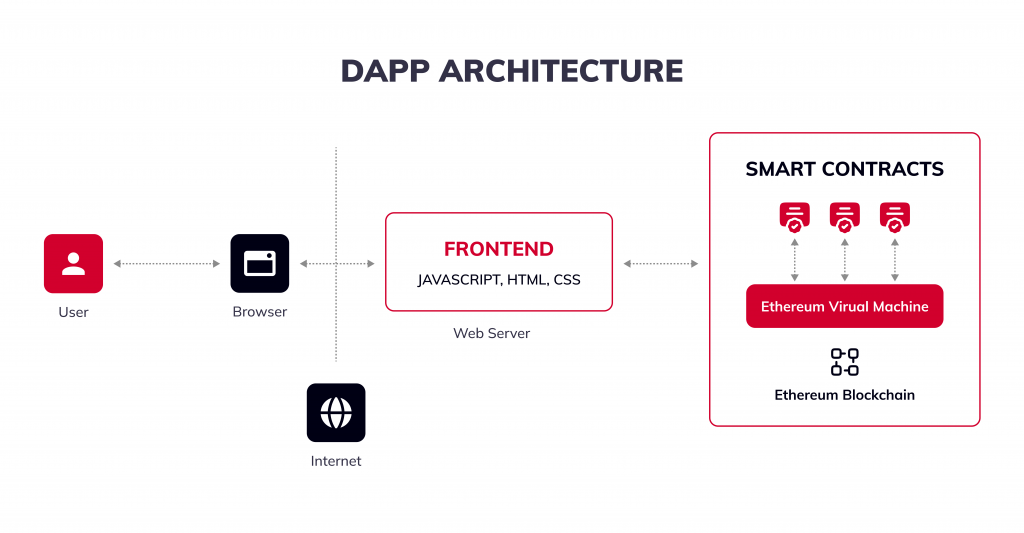
- The webserver only provides static HTML/JS/CSS files.
- No need for centralized backend or database.
5. Deployment and Execution
✅ Smart Contract Deployment
- Deploy the smart contract using Remix IDE.
- Compatible with Solidity 0.8.x (London Hardfork).
✅ Frontend Execution
- Frontend webserver runs via npm run dev (lite-server).
- Server address: http://34.64.168.109:3000/
✅ Important:
You only deploy the smart contract.
The webserver is already running at the above address.
Each student connects their own deployed contract to the frontend.
6. Practice Flow
✅ Practice Steps:
- Deploy your smart contract on the WorldLand network using Remix IDE.
- Copy the deployed contract address.
- Open http://34.64.168.109:3000/.
- Paste your contract address and connect.
- Play Rock-Paper-Scissors using WLC!
✅ Additional Notes:
- The frontend interacts directly with the blockchain via Web3.js.
- Full project source code available at:
👉 https://github.com/smin-k/RockPaperScissors
✅ Practice Architecture
- Students deploy their own contracts.
- Connect those contracts to a shared frontend server (already running).
✅ If Deployment Fails
If you experience errors during your own deployment (e.g., network congestion or gas issues),
you can temporarily use the following pre-deployed contract address:
👉 0x94f1454eb686c983D7452Add4FF0fbF2c7F253E4
This contract is already deployed on the WorldLand network and ready to be connected.
✅ Important After Deployment
After deploying your own contract,
please record your deployed contract address in the following spreadsheet:
👉 Contract Address Submission Sheet
This will help us verify and track all participants’ deployments.