Seungmin Kim([email protected])
2026/04/06
Overview
This practice aims to help students understand the basic operating principles of the Ethereum blockchain by experiencing the network directly from a user’s perspective. Students will create a wallet using MetaMask, receive test ETH on the Sepolia testnet, and then send ETH to another address. Afterward, they will analyze the transaction through Etherscan to observe how transactions are recorded and verified on the blockchain.
- MetaMask Installation and Testnet Connection
- Sending a Transaction and Checking the Transaction Result
0. VPN (WARP) Installation Guide
WIFI: BCAI / Compress
Because GIST uses the National Research and Education Network, access to some blockchain-related services may be restricted. For example, MetaMask RPC connections may not work smoothly, or sites such as faucets and Etherscan may fail to load properly. In many cases, these issues are not caused by user misconfiguration, but rather by restrictions in the campus network environment.
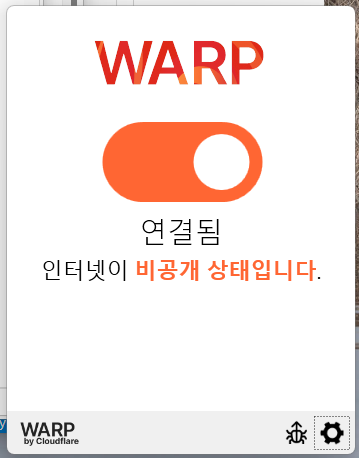
In this case, a VPN can be used as a way to bypass network restrictions. For this practice, Cloudflare WARP is recommended because it is relatively simple to install and use.
What is WARP?
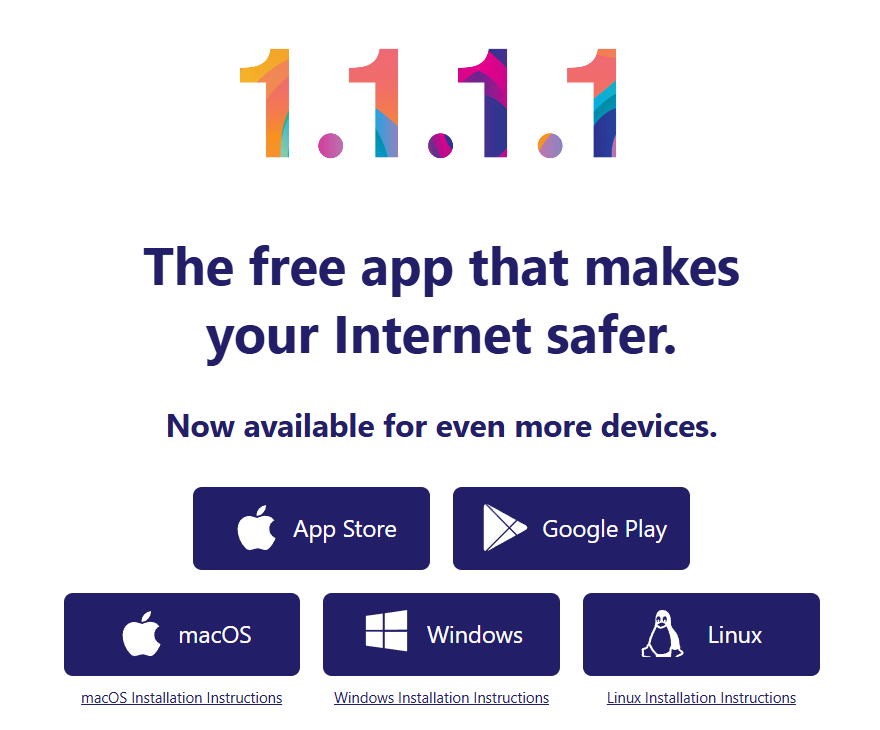
WARP is a network protection service provided by Cloudflare. It encrypts the user’s internet traffic and routes it through a more stable path. It works similarly to a general VPN, but it is easier to install and use, making it suitable for a practice environment.
1.1.1.1 — The free app that makes your Internet faster.
1. Installing MetaMask and Connecting to a Testnet
What Is a Cryptocurrency Wallet?
A cryptocurrency wallet is not really a place where blockchain assets themselves are stored. Rather, it is a tool that manages the private key needed to access a blockchain account and sign transactions. Blockchain assets are not stored inside the wallet; they are recorded on the blockchain network itself. The wallet simply allows the user to view and use those assets.
Through a wallet, users can check their own address, view their assets, and send ETH or tokens to other addresses. In addition, when interacting with smart contracts, users also use the wallet to sign transactions. Therefore, a cryptocurrency wallet should be understood not as a simple storage box, but as both an authentication tool and an interface for using a blockchain account.
When a wallet is created, the following information is generated:
- Address: A publicly shareable account identifier
- Private Key: Secret information used to sign transactions
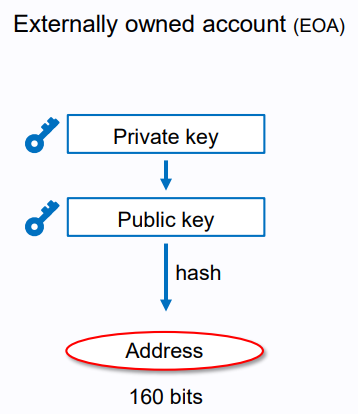
The figures below help illustrate this idea more clearly. The first figure shows how an externally owned account (EOA) is related to cryptographic keys. A private key is used to derive a public key, and the address is then generated from the public key through hashing. This means that the wallet mainly manages the private key, while the address serves as the public identifier that others can use to send assets.
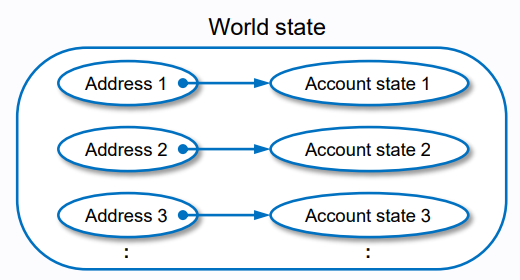
The second figure shows the concept of the blockchain world state. Each blockchain address is linked to an account state, which contains information such as balance and other account-related data. In other words, assets are not stored inside the wallet itself. Instead, they are recorded on the blockchain, and the wallet provides the means to access and control the corresponding account.
What Is MetaMask?
MetaMask is a representative example of a cryptocurrency wallet. It is wallet software that allows users to connect to Ethereum and other EVM-compatible blockchain networks. Through MetaMask, users can create an account, check their wallet address, send ETH or tokens, and interact with smart contracts.
In particular, MetaMask is widely used in introductory Ethereum practice because it is easy to use as a browser extension. In this practice, students will use MetaMask to create an account, connect to the Sepolia testnet, receive test ETH, and send a transaction.
Installing MetaMask
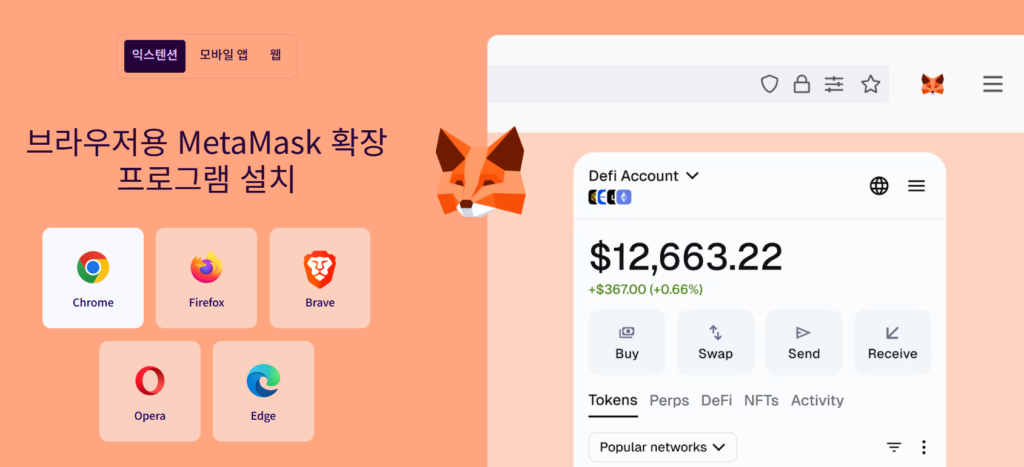
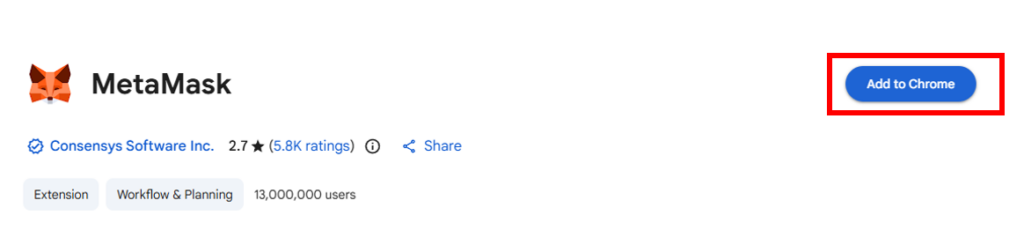
First, visit the official download page and select the browser you are using. You will then be redirected to the official web store for that browser, such as Chrome, Firefox, Brave, Opera, or Edge, where you can add the MetaMask extension. After installation is complete, check whether MetaMask is enabled in your browser’s extension list.
Installation link: https://metamask.io/ko/download
👉 Once the installation is complete, the 🦊 MetaMask icon will appear in the upper-right corner of your browser.
Creating a Wallet
Once MetaMask has been installed, the next step is to create a wallet account that can be used on the Ethereum network.
- Launch MetaMask: Click the MetaMask icon in the upper-right corner of your browser to open it.
2. Select Create a New Wallet: On the initial screen, choose Create a new wallet.
3. Set a Password: Create a password that will be required when using the wallet.
This password is used to protect MetaMask in the current browser.
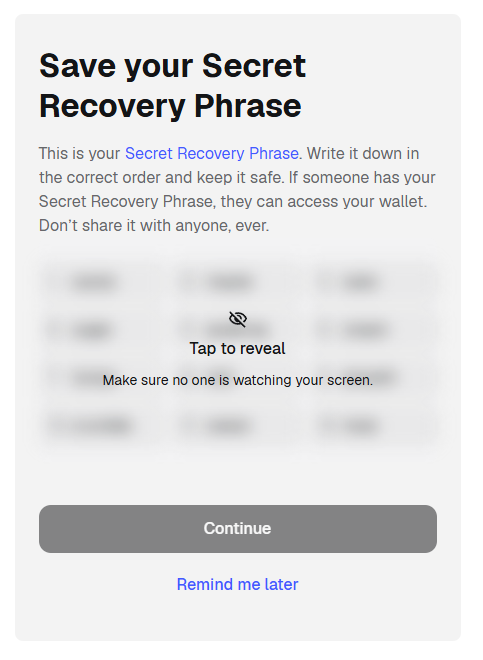
This is not just a simple sign-up process, but a process of generating a cryptographic key pair for use on the blockchain. Among these, the Secret Recovery Phrase is the most important, because it can be used to restore the entire wallet.
MetaMask provides a Secret Recovery Phrase, which consists of 12 words.
This phrase serves the following purposes:
- It allows the wallet to be restored on another device.
- It makes it possible to recover the account even if the password is forgotten.
- It is the underlying information used to regenerate the private key.
Once the recovery phrase has been confirmed, the wallet creation process is complete.
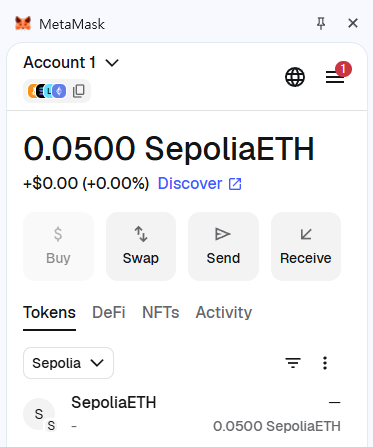
On the MetaMask main screen, you can check the following information:
- Account name (Account 1)
- Wallet address
- Current balance
Switching to the Ethereum Sepolia Test Network
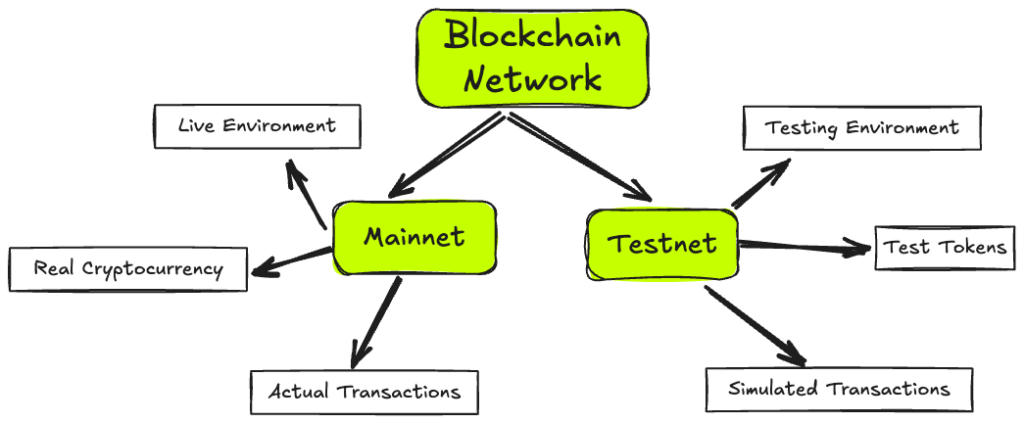
What is a testnet?
A testnet is a blockchain network used for practice and development without using real assets. It allows users to try wallet setup, send transactions, deploy smart contracts, and test decentralized applications in an environment that resembles the main Ethereum network. In this class, we use a testnet so that students can safely practice without risking real money
After installing MetaMask, you should first check which network it is currently connected to before starting the practice. MetaMask supports several default networks, including Ethereum, and test networks can be shown in the settings or added manually
Sepolia is a public Ethereum test network that operates in a way similar to the Ethereum mainnet. Developers can use Sepolia to create accounts, send ETH, deploy smart contracts, and test dApps. In other words, it serves as a practice environment for testing functionality before deploying to the real mainnet.
When MetaMask is first installed, Ethereum Mainnet is selected by default.
However, for this practice, you need to switch to a test network so that no real money is used.
- Settings → Advanced → Enable “Show test networks”
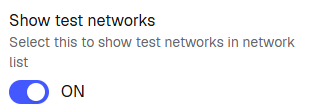
2. Select Sepolia from the list.
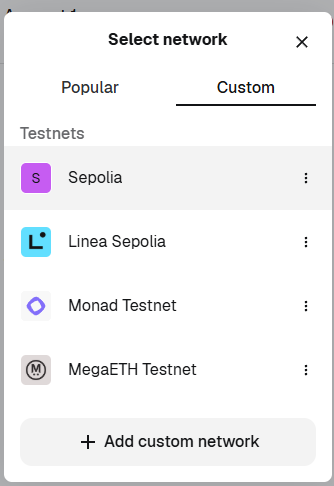
If a screen like the one below appears, the connection has been completed successfully.

Enter Your Information in the Google Sheet
👉 Access the link below:https://docs.google.com/spreadsheets/d/1eeemHdtuIXhlU7gCy443pjE-sNkCufb9PubZs0iMtZA/edit?usp=sharing
Information to enter:
- Name
- MetaMask wallet address
2. Sending a Transaction and Checking the Transaction Result
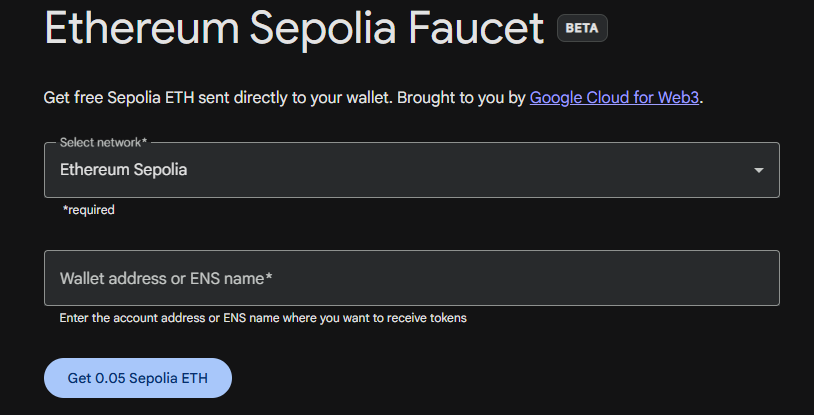
What Is a Faucet?
After switching the network to Sepolia, you first need to receive test ETH through a faucet.
Once you switch to Sepolia, your balance will appear as 0 ETH.
In this state, you cannot send any transactions, so you must first obtain some test ETH.
A faucet is a service that provides free ETH for use on a test network. Since testnet ETH has no real economic value, developers and learners can use a faucet to receive the tokens needed for practice. In this exercise, you will use a Sepolia testnet faucet to receive test ETH and then use it to send an actual transaction.
Google Sepolia Faucet
https://cloud.google.com/application/web3/faucet/ethereum/sepolia
Once the transfer is submitted, MetaMask will show a status such as Pending or Success. What is important here is that the process does not end the moment the user clicks the send button. Instead, the user’s request is turned into a transaction, broadcast to the network, and only becomes fully confirmed after it is included in a block.
Sending ETH to Another Person
Now that you have a balance, try sending a transaction to someone else. Send 0.005 ETH to one of the wallet addresses listed below yours in the Google Sheet.
https://docs.google.com/spreadsheets/d/1eeemHdtuIXhlU7gCy443pjE-sNkCufb9PubZs0iMtZA/edit?usp=sharing
You can send the transaction by clicking the Send button in MetaMask.
The transfer is carried out in MetaMask. Open MetaMask, click Send, paste the address copied from the Google Sheet, and enter the amount to send. Then check the estimated gas fee and click Confirm to submit the transaction.

Gas and gas fee
Gas and gas fees are very important concepts for understanding Ethereum transactions. First, gas can be understood as a unit that measures the amount of computational work required to process an action on the Ethereum network. For example, a simple ETH transfer requires relatively little computation, while executing a smart contract or calling a complex function requires more computation and therefore uses more gas.
A simple ETH transfer usually costs 21,000 gas. However, transactions that include data or interact with smart contracts require additional gas.
On the other hand, a gas fee is the actual cost paid for that gas. In other words, the fee a user pays is generally calculated as:
Gas Used × Gas Price
Because of this, even for the same ETH transfer, the final fee may vary slightly depending on network conditions. Gas fees are necessary because real computational resources are used to verify transactions and include them in a block. Without such a cost, it would be easy to send unlimited meaningless transactions, leading to spam attacks and wasted network resources.
The gas price is usually expressed in gwei(gigawei), which is a small unit of ETH commonly used for gas fees. Since gas prices are typically much smaller than 1 ETH, using ETH directly would result in inconvenient decimal numbers. For this reason, Ethereum interfaces such as MetaMask and Etherscan usually display gas prices in gwei.
The unit relationship is as follows:
- 1 ETH = 1,000,000,000 gwei
- 1 gwei = 10⁻⁹ ETH
For example, if the gas price is 20 gwei and the gas used is 21,000, then the total transaction fee is:
21,000 × 20 gwei = 420,000 gwei = 0.00042 ETH
In this way, gwei can be understood as a convenient unit for expressing gas prices more clearly.
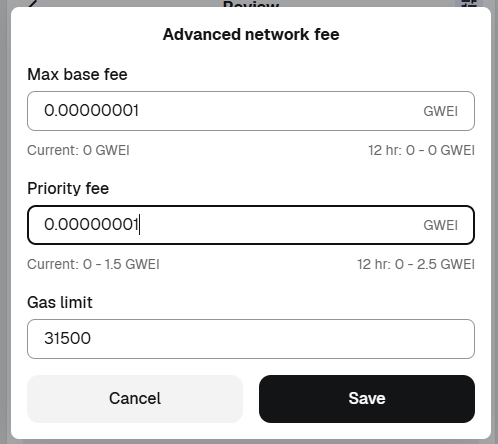
Ethereum gas fees can usually be understood through two main components. One is the Base Fee, which is the basic fee required by the network. The other is the Priority Fee (or Tip), which can be added to encourage faster processing of the transaction. The base fee changes depending on network congestion, while the priority fee is used to give validators an incentive to prioritize the transaction.
Users can adjust these values manually in MetaMask if they want, but for an introductory practice session, it is usually enough to use the default values suggested by MetaMask.

After completing the transfer, the transaction status in MetaMask will first appear as Pending, and then change to Success after a short time. This process shows how the user’s transfer request is created as a transaction, broadcast to the Ethereum network, and temporarily placed in the transaction pool (mempool), where it waits to be included in a block.
In the mempool, transactions compete for inclusion, and in general, transactions offering a higher priority fee are more likely to be selected earlier because the priority fee acts as an incentive for validators. Once a validator includes the transaction in a block, it becomes confirmed, and MetaMask updates its status to Success.
At this point, you will also see the Transaction Hash (Tx Hash). The Tx Hash is a unique identifier for a specific transaction on the blockchain, and it can later be used to look up that transaction again on a blockchain explorer.

Block explorer
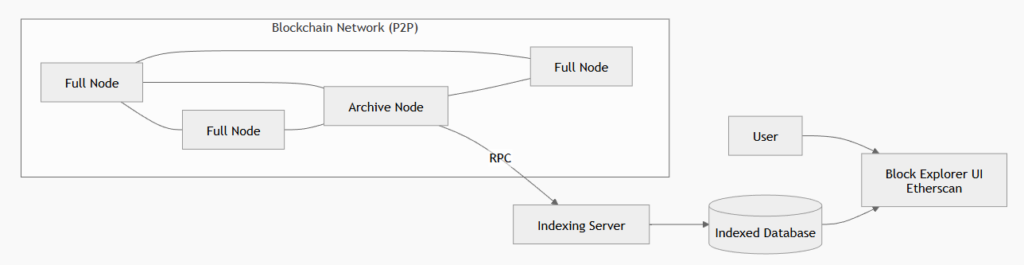
The Etherscan used here is an Ethereum block explorer. A block explorer is a tool that displays data recorded on the blockchain in a form that is easier for humans to read. It typically retrieves data from blockchain nodes that are directly connected to the network, often through archive nodes via RPC. This data is then organized into a searchable form using indexing servers and databases, and finally presented to users through a web interface.
Etherscan is one of the most representative Ethereum explorers, allowing users to search for and view transaction histories, addresses, tokens, and smart contract information.
Ethereum (ETH) Blockchain Explorer
Add the Transaction Hash to the Google Sheet
https://docs.google.com/spreadsheets/d/1eeemHdtuIXhlU7gCy443pjE-sNkCufb9PubZs0iMtZA/edit?usp=sharing
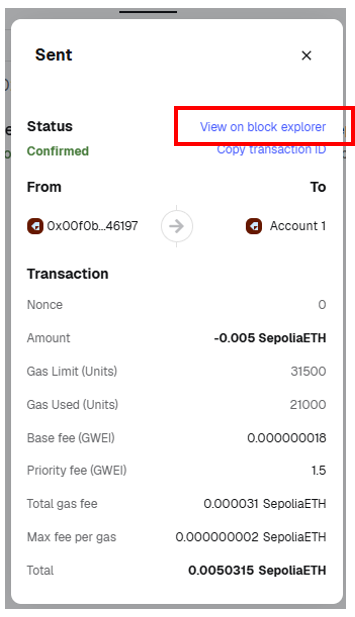
Transaction Information
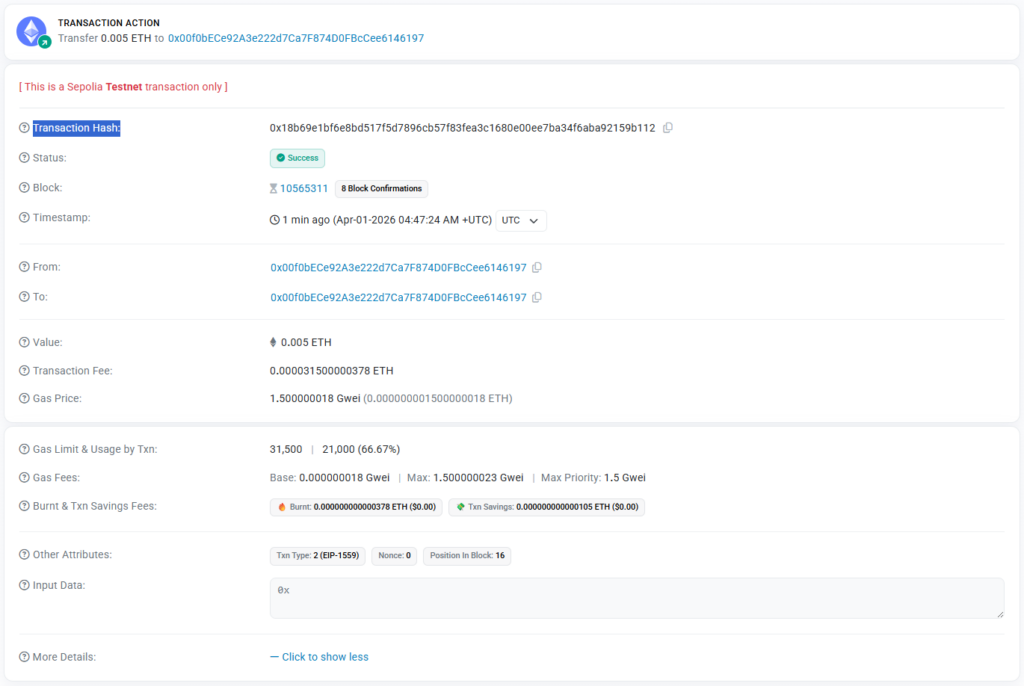
When you look up a transaction on Etherscan, a variety of information is displayed for that single transaction. This information does not simply show that “the transfer was successful,” but explains in detail how the transaction was processed on the blockchain.
First, the Transaction Hash is a unique identifier used to distinguish that specific transaction. Each transaction is assigned a different hash value, and users can use this value to search for the transaction again later. In other words, the Transaction Hash can be understood as a kind of unique serial number for finding a transaction on the blockchain.
Block refers to the number of the block that contains the transaction. On a blockchain, transactions are not stored one by one separately; instead, multiple transactions are grouped together into a single block. Therefore, the block number shows in which block the transaction was included. The Confirmations shown next to it indicate how many additional blocks have been added on top of that block. The larger this number is, the more securely confirmed the transaction is considered to be.
From and To refer to the sender’s address and the recipient’s address, respectively. Through these fields, users can see from which account to which account the asset was transferred. During practice, there may be cases where a user sends ETH to themselves, in which case the From and To addresses may appear identical.
Value indicates the amount of ETH that was actually transferred. For example, if it shows 0.005 ETH, that means 0.005 ETH was moved through the transaction. This is the amount that the user directly specified when sending the transaction.
Transaction Fee is the total fee paid to process the transaction on Ethereum. It is determined by the amount of gas used and the fee paid per unit of gas. For this reason, sending ETH requires not only the transfer amount itself but also an additional gas fee. The Gas Limit & Usage by Txn section shows the maximum gas allowed for the transaction and the amount actually consumed. In general, a simple ETH transfer uses a fairly consistent amount of gas, while smart contract interactions usually consume more.
In addition, Etherscan may also show fields such as Base Fee, Max Fee, and Max Priority Fee. These values are related to Ethereum’s gas fee structure and distinguish between the basic network fee and the additional priority fee offered to validators.
Finally, Input Data shows the data field included in the transaction. In the case of a simple ETH transfer, there is no separate function call, so it is usually displayed as 0x. On the other hand, if the transaction calls a smart contract, this field contains the encoded function call information and parameters. Therefore, it can also serve as a clue for distinguishing a simple ETH transfer from a smart contract interaction.
Transaction Cancellation
This time, you will first send a transaction and then attempt to cancel it while it is still not included in a block.
Through this process, you will examine how transaction cancellation actually works in Ethereum and what kind of interaction occurs between the wallet and the network during the cancellation process.
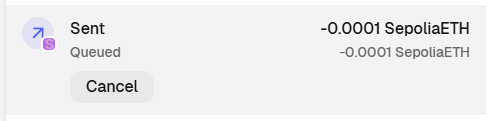
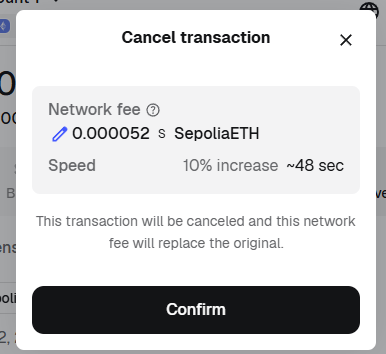
In Ethereum, “canceling a transaction” does not mean deleting a transaction that has already been sent.
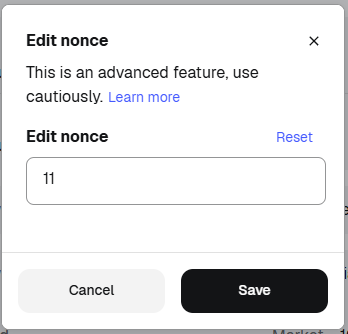
Instead, it is done by sending a new transaction with the same nonce as the original pending transaction, but with a higher fee, so that the new transaction replaces the old one.
In other words, cancellation is not a simple deletion, but a process of overwriting an existing pending transaction with another transaction.
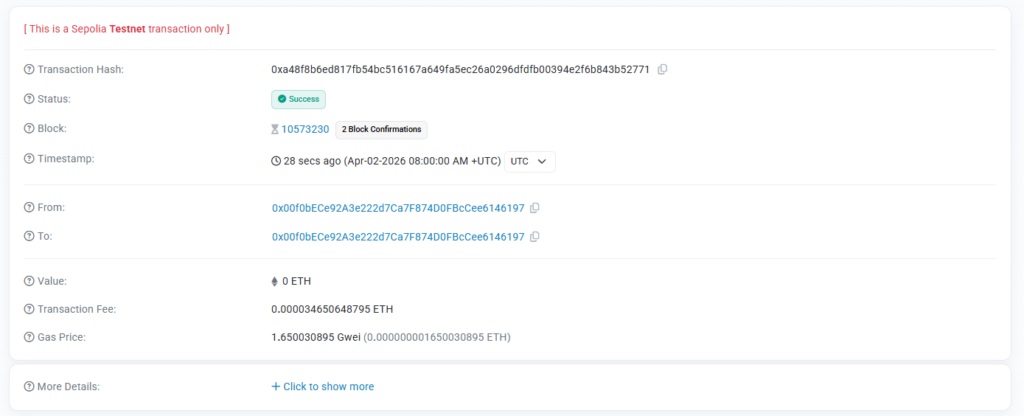
What is a nonce?
A nonce is a counter that represents the order of transactions sent from a particular externally owned account (EOA). Each new transaction from the same account is assigned the next nonce value automatically. For example, if the first transaction has nonce 0, the next transactions will have nonce 1, 2, and so on.
A nonce serves several important purposes in Ethereum. First, it determines the order in which transactions from the same account are processed. Second, it prevents the same signed transaction from being executed more than once, which helps protect against replay attacks. Because only one transaction with a given nonce can be executed for each account, the network can distinguish valid new transactions from duplicate ones.
This property is also important for transaction cancellation and replacement. In Ethereum, cancelling a transaction does not mean deleting a transaction that has already been sent. Instead, a user replaces a pending transaction by sending a new transaction with the same nonce but a higher gas fee. Since two finalized transactions from the same account cannot share the same nonce, the network will only accept one of them.
For example, if a transaction with nonce 5 is still pending, the sender can create another transaction from the same account with nonce 5 and a higher fee. In practice, wallet applications often do this by sending 0 ETH to the sender’s own address, using the same nonce, in order to replace the original pending transaction.
Try It Yourself 1 : Low-Fee Transaction Experiment
Try sending a transaction with a lower fee than MetaMask’s suggested setting and observe what happens. In many cases, the transaction may still be included in a block, but it may remain pending for longer in the mempool before confirmation. This is because transactions with lower fees are generally less competitive than those offering higher priority fees. However, on a test network such as Sepolia, blocks are often not completely full, so even lower-fee transactions may still be included after some delay. If the transaction becomes stuck, try speeding it up or canceling it with a replacement transaction.

Try It Yourself 2: Reusing a Nonce
Try manually setting transaction nonce values to see how nonce affects transaction processing order. For example, submit a transaction with a higher nonce than expected, and then try another transaction with a lower nonce. Observe whether the wallet allows the transaction, whether it remains pending, and in what order the transactions are eventually processed. Through this experiment, verify that transactions from the same account are not simply executed in the order they are sent, but are processed according to nonce order. This helps show that nonce acts as a mechanism for enforcing sequential execution and preventing duplicate or conflicting transactions.